New pattern: Liquid Honey

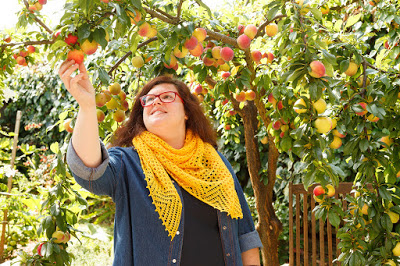
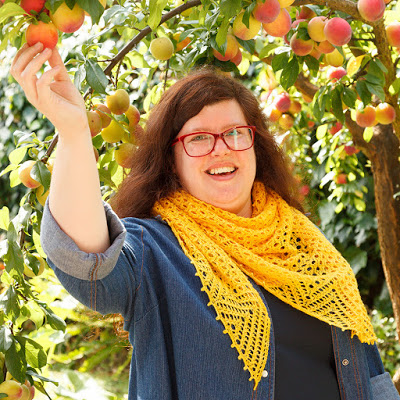
So happy I can finally share this with all of you! Liquid Honey is my second pattern to be published in Knitty, and it's one I'm super proud of.

And that's not all... my face is on the cover of the Spring + Summer issue! I've been making 'cover girl' jokes all day, it's been quite surreal... :)

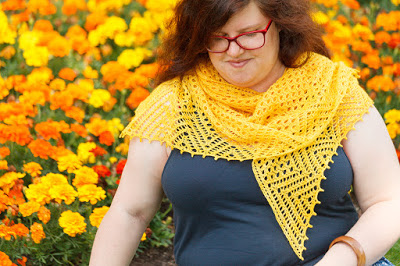
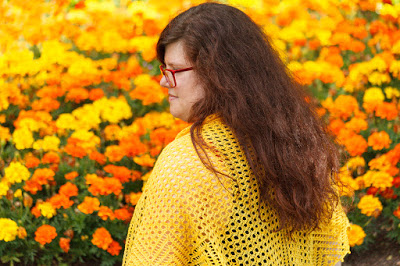
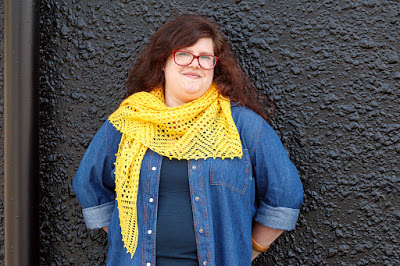
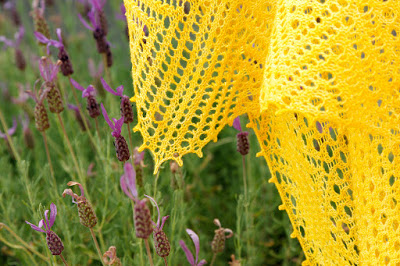
I love yellow, and I love knitting lace, and I'm totally fascinated by bees. Put it all together, and you get a sunny yellow shawl inspired by honeycomb dripping with honey. I thought its cheeriness would make it a great fit for Knitty, and a nice gift for my fellow knitters.

Features:

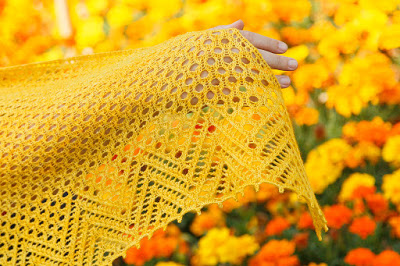
  • honeycomb lace with a zigzagging lace border

  • top-down triangular construction with garter-tab cast on

  • no special stitches: just knit, purl, single and double yarn-overs, k2tog, ssk

  • a decorative picot bind off

  • requires 1.5 skeins of Malabrigo Lace (700yds of laceweight yarn)

  • suitable for solid or semi-solid colourways

  • one size: 63" wingspan, 29" along spine

  • both charted and written instructions.

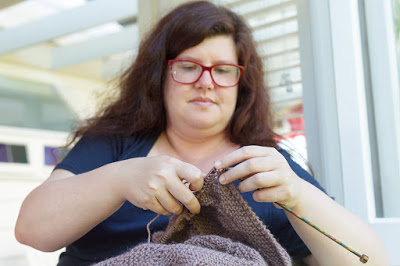
The main part of the shawl is very repetitive and intuitive to knit, perfect for an on-the-go or tv-knitting project. The edging requires a little more attention, and I do recommend using needles with nice sharp points, for example Addi Lace needles. They kept me sane!

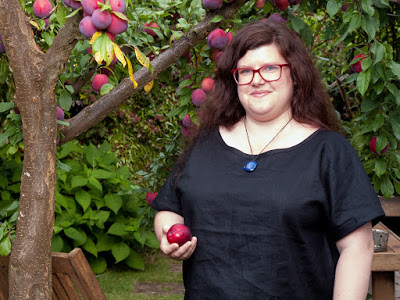
Shout out to my best photographer Dad for doing the photoshoot with me, and finding all the summery-looking flowers in the garden and around the town. And another shout out to Mum & Dad's 'Fortune' plum tree for co-starring in the photos! Since then, the plums have ripened and been turned into a couple of dozen jars of sauces and jams. Go tree.

The pattern is available for free here at Knitty.com. Its Ravelry page is here.

You can also read my post from last September on the story of Knitty and me.

Craft holiday II

My post-Christmas break in NZ is nearly over, so it must be time to show off all the things I made! Like my previous craft holiday, I took full advantage of having access to Mum's sewing machine. This time I made tops using downloadable indie patterns. I haven't had much experience sewing from patterns (as opposed to following photo tutorials on blogs or just figuring things out myself) - so I learned a lot along the way. :)

I started off making a Wiksten top out of some lightweight cotton fabric with a diagonal tie-dye stripe. I enlarged the pattern one extra size, which worked well - hooray for drawing skills! The fit is pretty good, certainly good enough for a casual top.

I dove into making a second one, this time using a crystal-print cotton sateen fabric from Spoonflower and plain white bias binding. Mum thought the fabric was far too heavy for a Wiksten top, and (surprise, surprise) she was totally right - it didn't drape well, so the not-quite-right fit around the armholes was very obvious. She fixed the problem by demonstrating how to put in some small darts above the bust line - thanks Mum!

I moved on to another pattern for my next sewing adventure, a Fen top in a black linen-cotton blend. Instead of following the pattern's instructions I kind of did my own thing while sewing it up. This worked out very well with the bias binding around the neckline (which is super tidy if I do say so myself):

However, I messed up with the seams - I decided to do French seams again, but didn't realise it would cause problems with the curved underarm seams. Luckily the fabric looks the same on both sides, so I just decided to turn the top inside-out and continue. It's not a mistake, I declare, it's a design decision to have my French seams on the outside. ;)

Again, my fabric was a bit too heavy for the pattern, but I think it looks ok this time. It's certainly a very comfortable, roomy top. I'll be looking out for lighter, drapier fabrics to make more Fen tops the next time I do some sewing.

Learnings:

  • using proper patterns isn't hard or scary

  • I can enlarge a pattern if necessary by looking at the outlines of the other sizes and just drawing one size further

  • bias binding isn't hard to get nice and tidy (if you use the iron a lot)

  • fabric choice is IMPORTANT - pay attention to the pattern's fabric suggestions, and Mum's warnings

  • French seams are awesome, but not for curved underarm seams

  • linen / linen blends are easy to work with

  • bust darts are my friends

--------------------------------------------------------------------------------------------

I've also been knitting away on a new scarf design which I plan to release in the next week or two, once it's all photographed and polished up. Here's a peek at the scarf-in-progress...

Craft holiday

My stay in Whakatane is drawing to an end, and on Saturday I'll be flying back to Melbourne. As always, I've done a lot of crafting while hanging out with Mum & Dad, sitting in my favourite knitting spot in the sun-room or bent over the sewing machine.

As part of my getting-ready-for-summer project, I sewed a couple of lightweight cotton skirts. I used the Purl Bee's tutorial Gathered Skirt for All Ages, and adapted it for a longer length and no pockets. My skirts are super comfy to wear, and were quite straightforward to make for a semi-beginner like me. Each one took me two days of tinkering. :)


I also want to finish sewing my ill-fated silk cowl, which will hopefully work out this time around! 

Last week I finished knitting a hat-and-mitts set, tweaked their patterns, and had a photoshoot with Dad behind the camera (which is always fun). I'm planning to release the patterns in December, so I don't want to give too much away just yet. Here's a tiny peek...


Finally, here are a few photos from Mum and Dad's garden. Yesterday I played around with Dad's smaller camera - it's never hard to find interesting things to photograph in a garden...

A rose called 'Greensleeves'

A fern frond unfurling

Plenty of thyme

Dyeing with eucalyptus II

We had a wonderful time in Napier! The food was amazing, the weather was pleasant, and the hotel was great. And so was the main event! Congrats Jeff and Colleen, it was a lovely wedding. I'm so glad Willie and I were able to be there. <3

The day after the wedding, hordes of friends and family descended on the Grays' place for lunch. The best part for me was watching their (very bouncy) dog play with their three goats. We've been hassling Jeff to take a video to put online, because it's ridiculously entertaining...

Between the goat paddock and the beehives were some eucalyptus trees with blue-green leaves. I've been on the lookout for some accessible blue-green eucalypts to dye fabric with, ever since I read in India Flint's Eco Colour that these are the ones which give orange or red dye. I asked nicely, and picked a few good-sized twigs to experiment with back in Whakatane.


On Tuesday I had a go at Flint's 'eco-print' technique, scattering pieces of eucalyptus twigs between the folds of a plain silk scarf, rolling it around a stick, and tying the bundle tightly with string.


I tossed the bundle and some leftover leaves and twigs into a pot with enough water to cover it all, and boiled it all for 45 minutes. Then the hard part began - waiting until the next day to unroll the bundle and see what colours I had!

And... it worked! The scarf has areas of apricot-orange where the leaves were pressed tightly against the fabric, and paler areas in between. I didn't achieve strongly defined leaf prints, but I'm happy with my first attempt. I imagine tighter rolling and tying of the bundle would produce clearer prints.


If you click and enlarge this last photo, you can see stripes in the upper left corner from the string around the bundle. Pretty cool! It's amazing what just leaves + fabric + water + heat can do.

Free pattern: Droste Effect

I have a hat pattern in the latest issue of Knitty! This is really exciting for me, as I first got lured into knitting as a hobby by the fun, free patterns in Knitty. This is Droste Effect, a hat covered in cables inspired by the structure of stockinette stitch: 


Features:
  • all-over cable pattern designed to look like stockinette stitch
  • crown decreases are integrated into the cable pattern
  • two sizes: adult small + large
  • a one-skein project: requires up to 185 yards of DK-weight yarn
  • full charted and written instructions
  • available for free!

The yarns I chose are two NZ yarns which have excellent stitch definition, perfect for knitting cables. The brown hat (size L) was knit using 2 balls of Skeinz Silver Lining in 'Clifton Stone', and the sea-green hat (size S) was knit using 1 skein of Vintage Purls Max in 'Abel Tasman'.

The name 'Droste Effect' is taken from the visual effect of a picture-within-a-picture, because the hat's cables represent a large-scale stockinette stitch (it's a knitting pattern that looks like knitting). Tins of Droste brand cocoa famously feature a nurse holding a tray with a cup and the same tin on it:


The photos were taken by Jos, my dad, when I was visiting Whakatane last. We went to one of my old childhood haunts - the playground by the river at The Heads. Bay of Plenty locals might recognise the rocks and Moutohorā/Whale Island in the background...


 We also played around with the picture-within-a-picture idea... :)


Droste Effect is available as a free pattern here at Knitty.com.
Its Ravelry page is here.